
Welcome to PrePurchasing
PrePurchasing Purchase Training Video
PrePurchasing Travel/Entertainment Training Video
PrePurchasing is an approval process for the business office to be able to assist with your purchases and reimbursements. This includes:
- Reimbursements for travel, entertainment, and professional expenses
- Purchases of goods and services
- Requests to create and reconcile cash advances
Please leave any and all comments/details that will be helpful to our staff. If they have any questions about your form, they will reach out to clarify before creating the Aggie Expense report or the order requisition in Oracle.
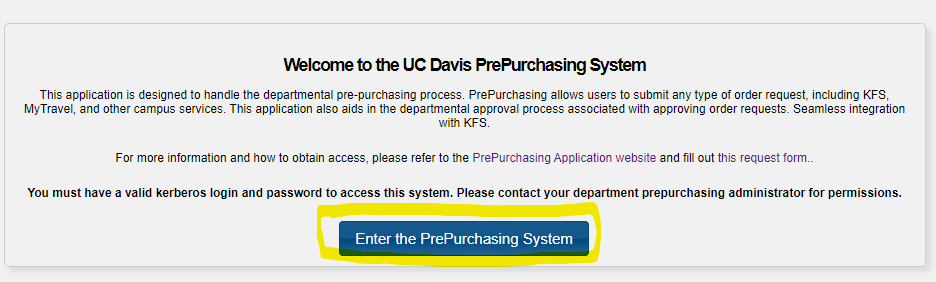
To enter the PrePurchasing System please go to https://prepurchasing.ucdavis.edu/. You’ll see the screen below. Click on the blue button that says: Enter the PrePurchasing System.
Once you’re in the system, a screen similar to the one below will appear. To create a PrePurchasing request hover over “Orders” on the top left for the dropdown menu. Then click on “Place Order”.
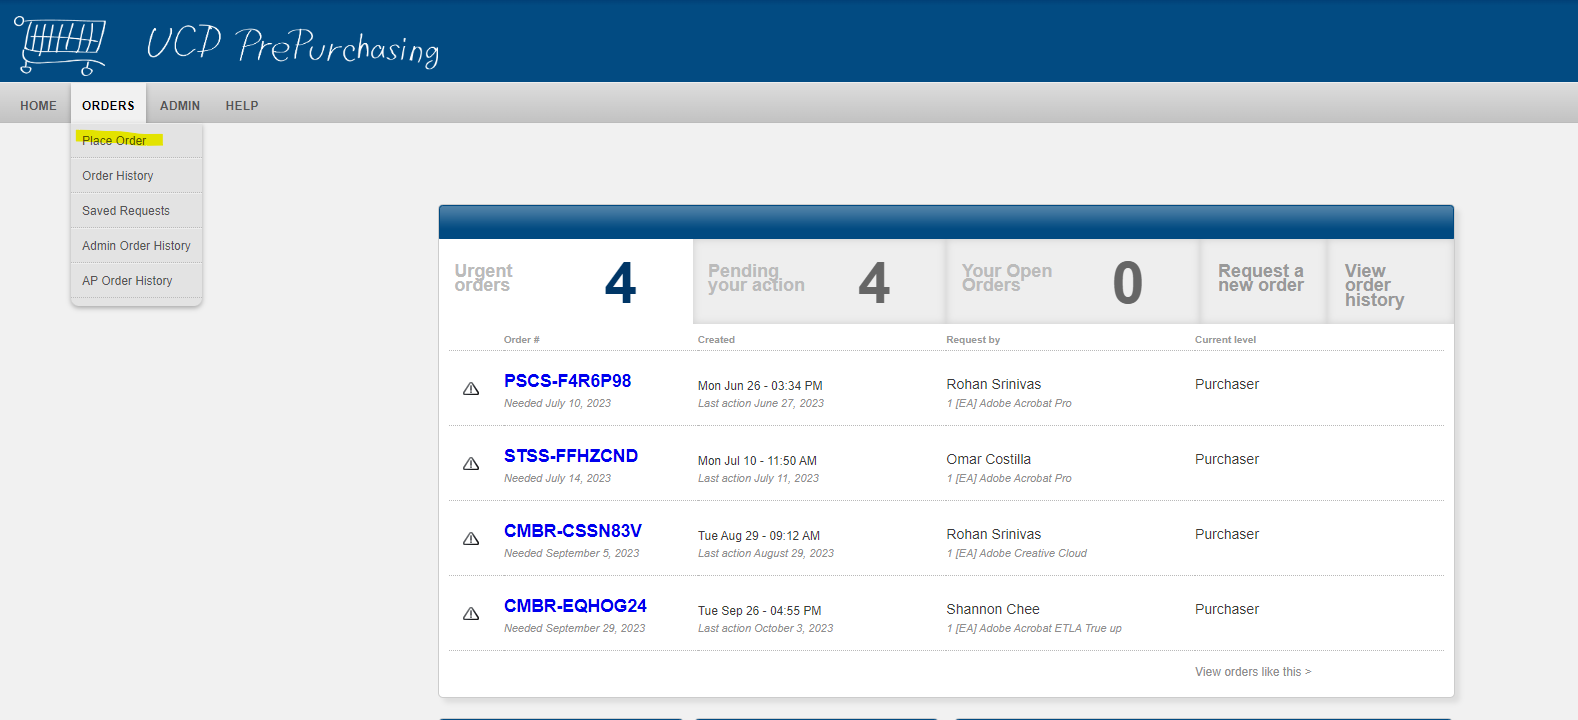
If you are set up as a requester for multiple PI’s then you will need to select the correct PI workgroup to begin your request. If you are not set up as a requester for more than one, then the request form will populate automatically for you.
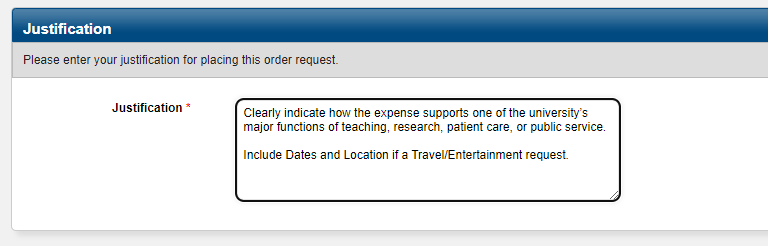
Once the request form is up please fill out the form as prompted, starting with the justification.
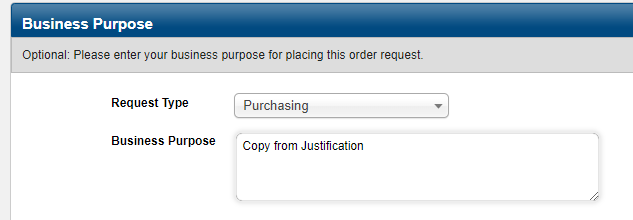
Above the business purpose, there is a drop down menu to select the request type. It defaults to purchasing but please update it to reflect your request accurately.
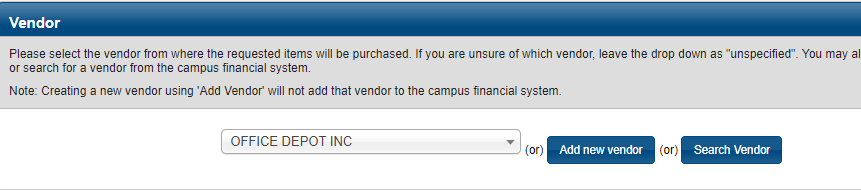
You will then be asked to select a vendor. Please leave it as unspecified if you are filling out a Travel/Entertainment request or any other request where the vendor is unclear and mention it in the comments..

If you are completing a purchase request, first check the drop down. If the vendor is not listed there then click on search vendor to select the vendor.
For the shipping address, please put down your name and your business office for the address. Fill it out this way, even if it’s for something that does not need to be physically delivered (ex: travel/entertainment request, request for a service etc.)

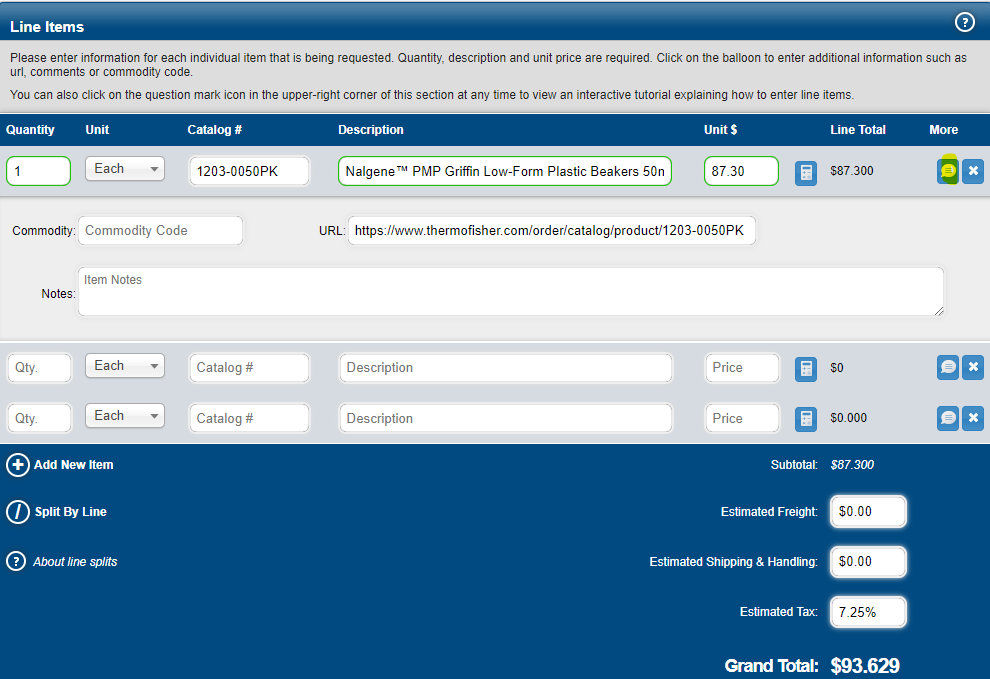
For a purchase request, please fill out the line items like the example below. Click on the speech bubble on the right to add comments and a URL to the product you need.
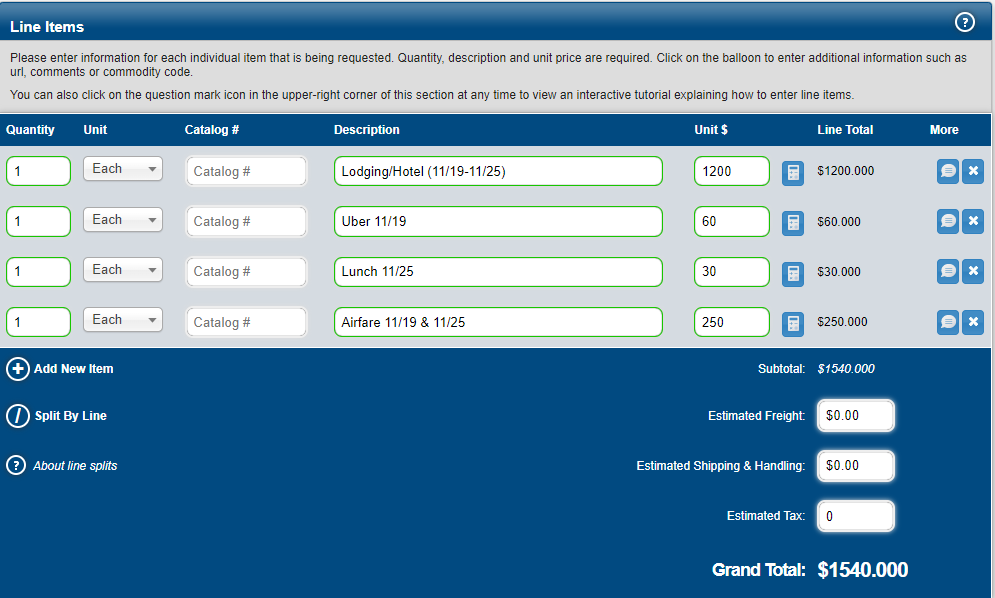
For a travel/entertainment request please fill out the line items like the example below. Please add notes/comments as needed. If you are requesting a service or something where the quantities are not clear, please put 1 quantity, and in the notes of either the item or at the end of the form, add comments specifying what you will be needing.
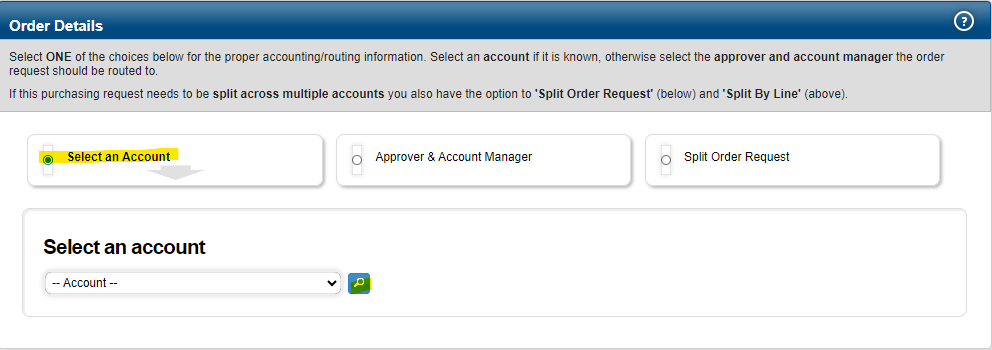
Lastly, for the order details, please make sure you click the bubble next to “Select an Account” and then select the account you need by selecting the blue magnifying glass or the drop-down menu.
A new window will open when you click on the magnifying glass and you will be able to find the account by either the description or the old account name.
If you need to split the order between two accounts, please mention that in the comments below. Do not select the option for Split Order Request.
If you do not see the account you think you should be able to see, add the account to the comments so the approvers will be able to still check it and approve/deny the request. Make sure to also email your business admin, and they’ll be able to add it to the workgroup for future use.
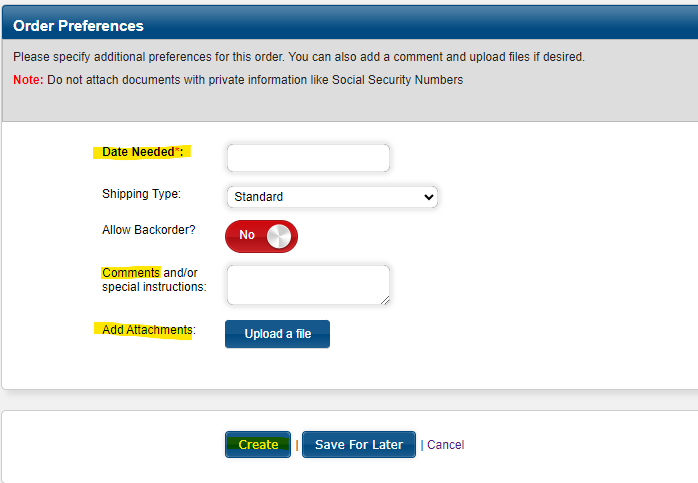
Under Order Preferences select the date you need the order by (please keep in mind it may take us 3-5 business days to process your request). Leave any additional comments here as well and upload any receipts, or quotes related to your request. If you are uploading a travel/entertainment request make sure every purchase has a receipt and the last four digits of payment are included.
Then click on “Create”.
At this point, your PrePurchasing request will route to the appropriate approver.